Dry Pomegranate Powder (Anardana powder) 1 tsp…Add spices of your choice…like chaat masala, garam masala, black pepper powder
Dry fenugreek leaves (roasted) 1 tsp
Oil/Ghee 3 tbsp
Green chilllies chopped 11/2 tbsp or as per choice
Coriander leaves washed and chopped 3 tbsp
Chopped Onions 1 cup
Water as required. I used 230 ml water
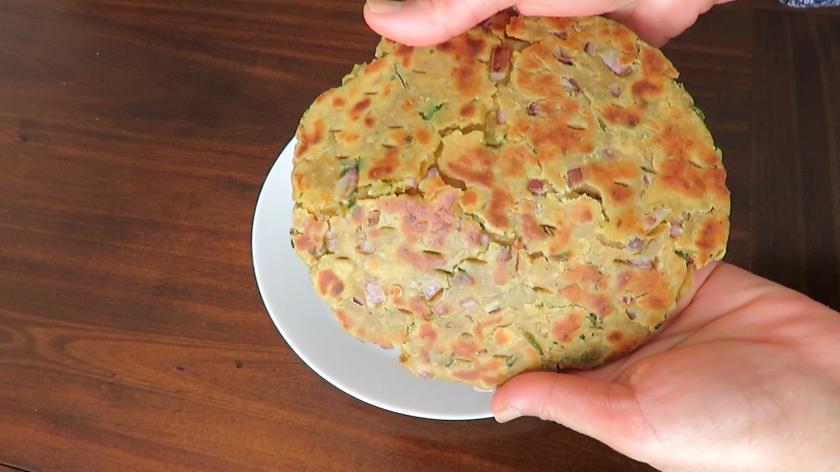
Note: Koki has a crumbly cookie-like texture. Signature style of making koki is rolling twice, and cooking twice on the tawa, so that it is cooked properly and yet can be made thick
Method:
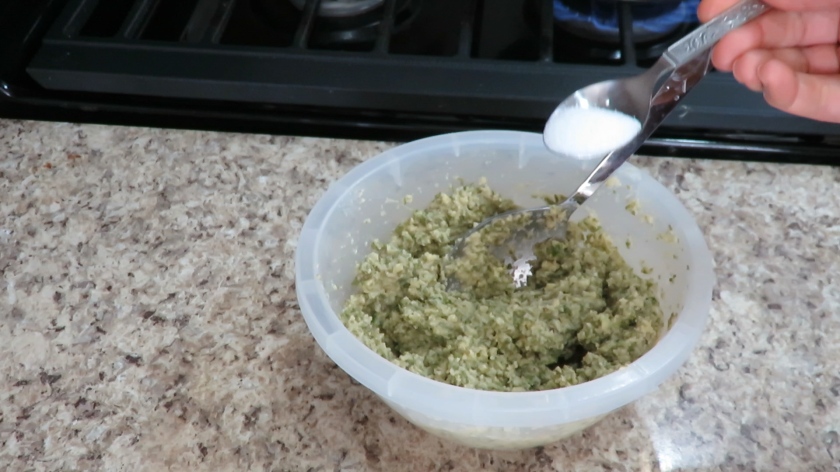
Mix all ingredients except water. Cover bowl with a lid and let rest for 5 minutes.
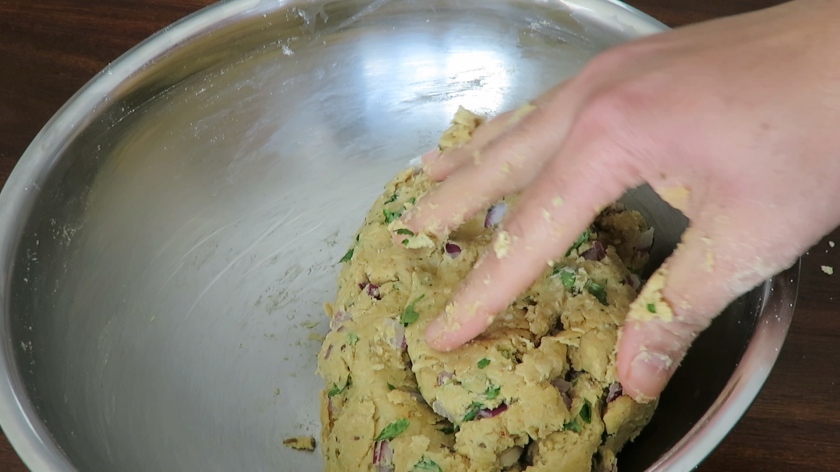
Add water and bring together the flour and water into a stiff dough. To ensure the crumbly cookie-like texture of koki, DO NOT knead the dough.
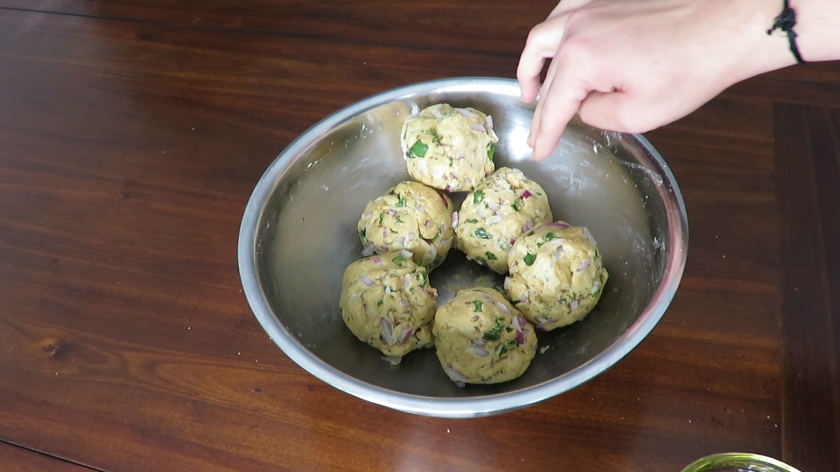
Divide the dough into 6 balls (or as desired). DO NOT rest the dough, else the texture will come out like a paratha.
Set a thick bottomed tawa to heat at medium.
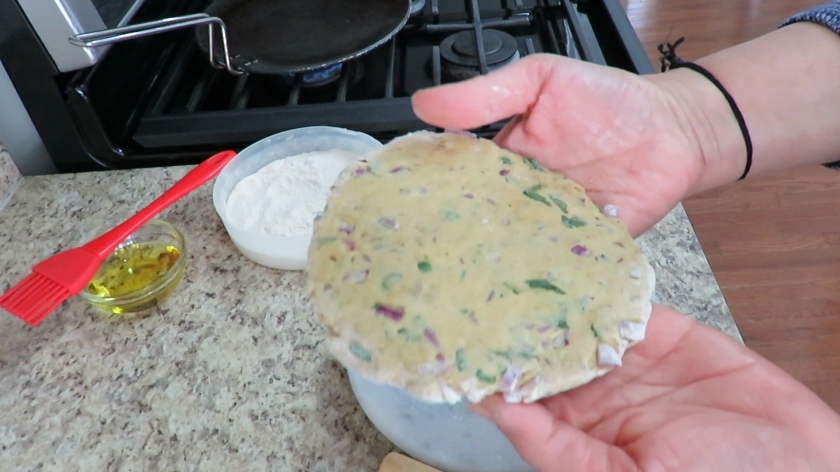
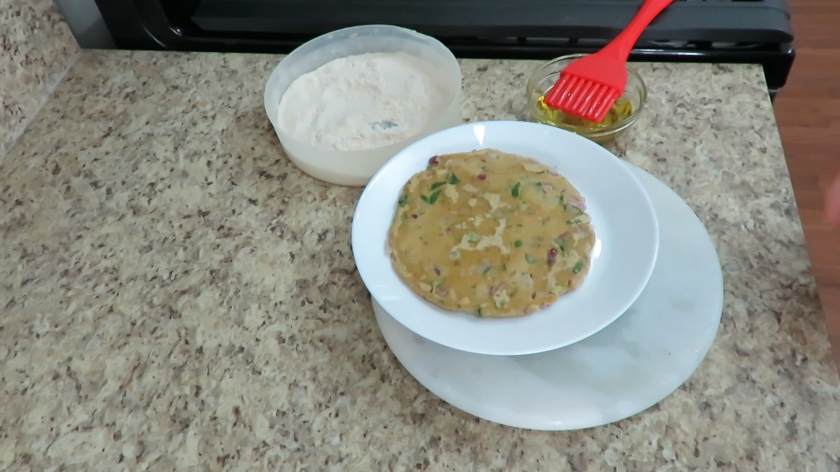
Roll a ball of dough into a thick disc.
Make sure tawa is a little more than warm, not very hot.
Apply some oil on the tawa.
Transfer rolled disc to tawa.
Cook it on each side for 10-15 seconds. No brown spots on disc at this stage.
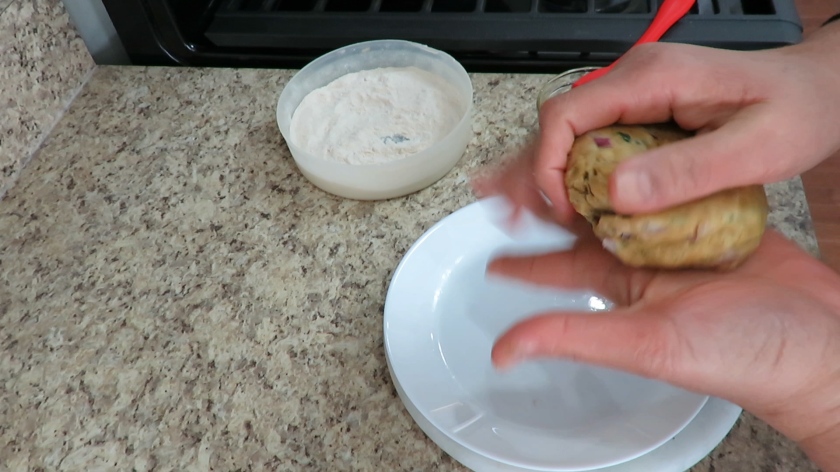
Remove this disc on to a plate and crush the disc to form a ball.
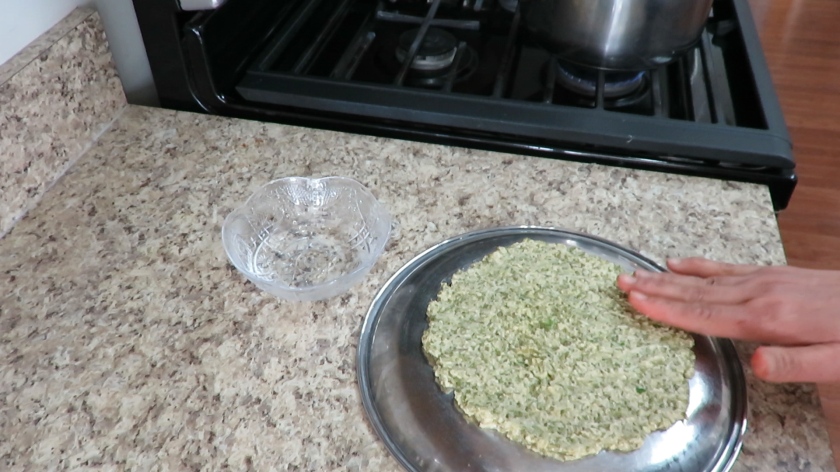
Roll this new ball into a thick disc (now a little bigger than the first time). Note, koki is rolled thicker than a stuffed paratha, and hence needs to be cooked twice to ensure complete cooking. This new disc will be crooked at the circumference since a partially cooked dough ball has been rolled out again!
Transfer this rolled disc to the tawa, and cook at low-medium heat
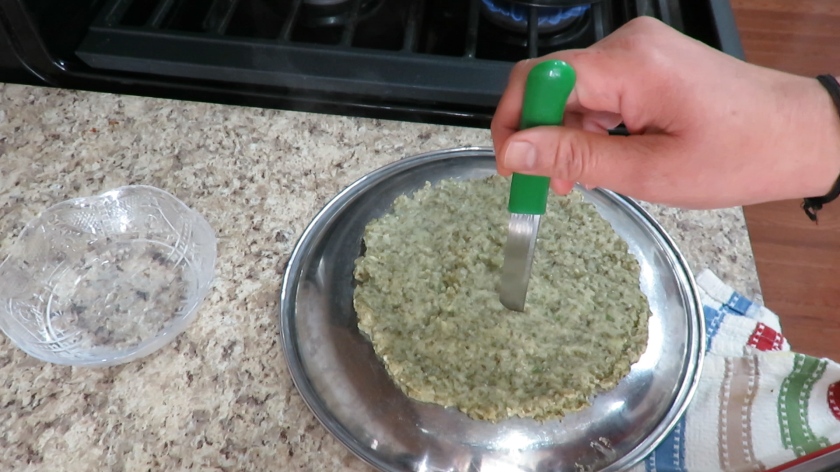
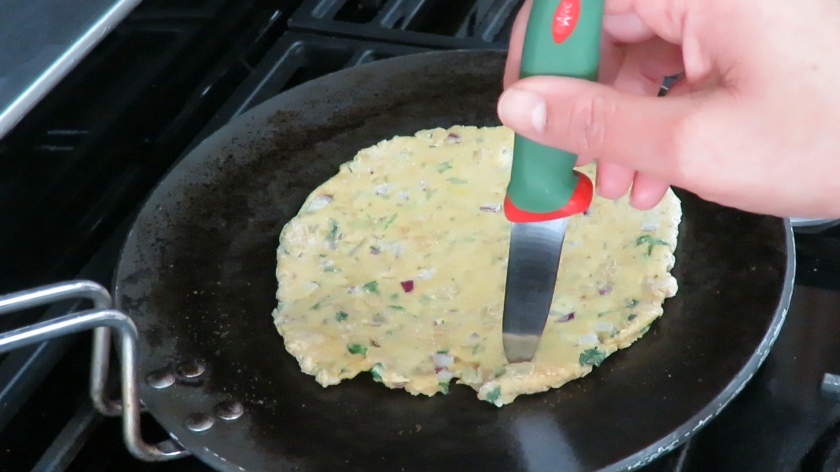
After a minute, mark cuts in the koki with a knife, for even distribution of heat.
Once the bottom side is partially cooked, flip koki and mark cuts with a knife.
Apply oil/ghee and fry koki on both sides.
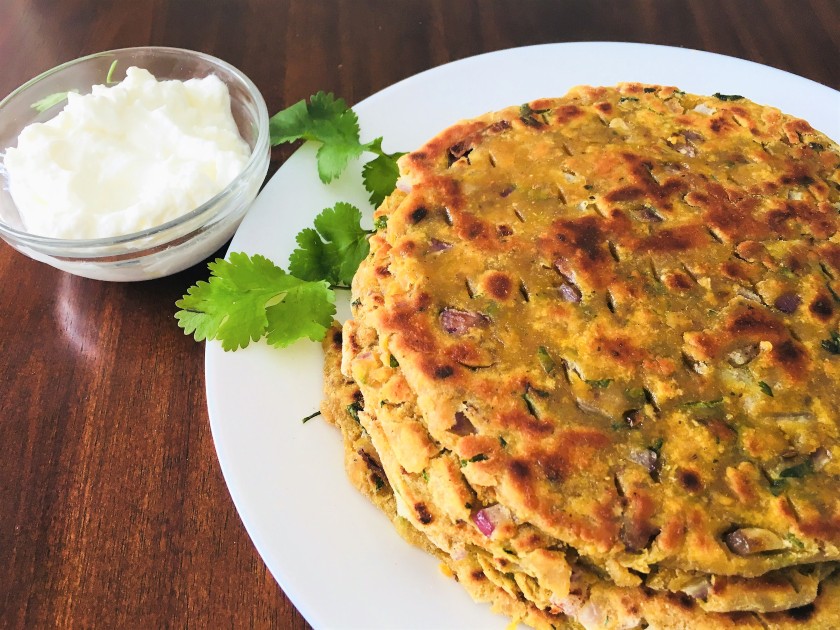
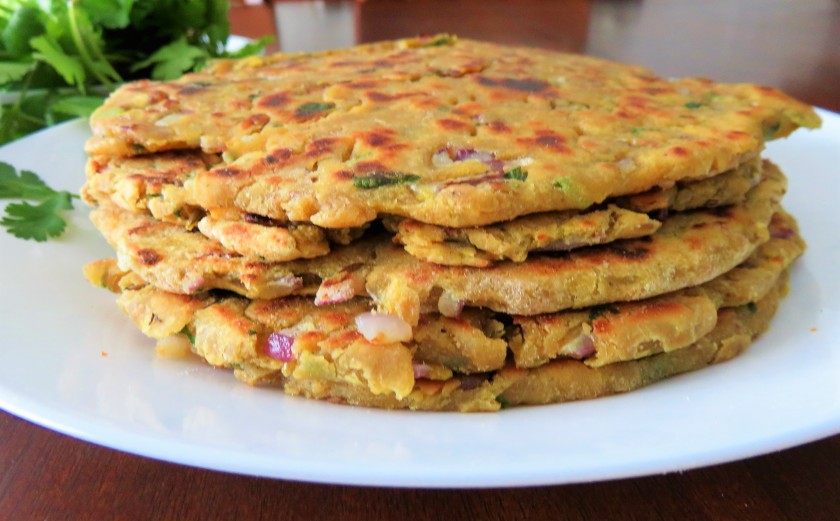
Enjoy with curd or buttermilk, roasted papad, pickle, tea/coffee or any curry of your choice!
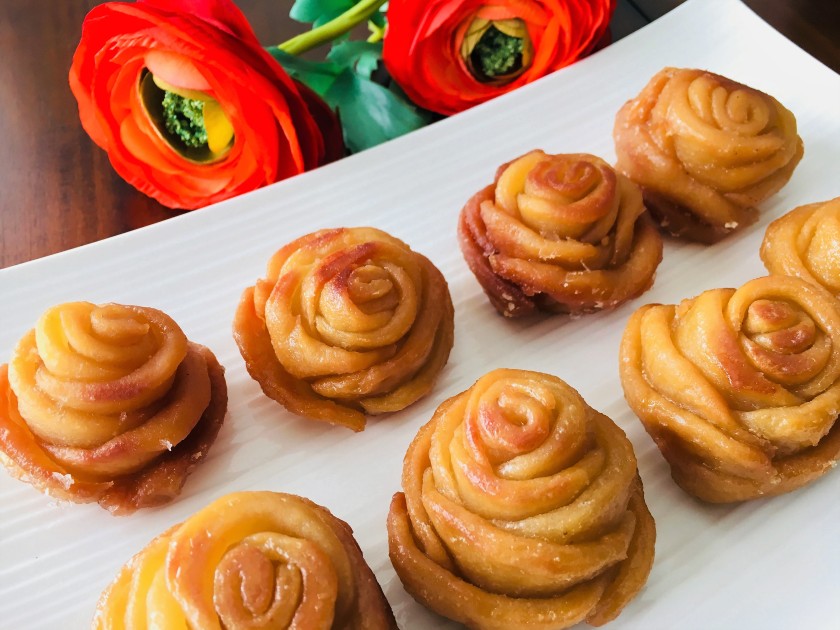
Sweet Edible Roses! Golap Pitha from the Bangla cuisine
Ingredients (makes 10 roses):
For dough
All purpose flour (Maida) 1 cup (little less than 150 g)
Milk (11/4 cup) (310 ml)
Salt (a pinch)
Sugar (1 tbsp)
Desi ghee ( 2 tsp)
For sugar syrup
Sugar ( 2 cups)
Water ( 1 cup)
Cardamom powder( Ilaichi powder) 1/4 tsp
Few drops of lemon juice to prevent crystallization of sugar
Method:
1. Set a non-stick pan to heat at medium.
2. Add milk, salt, sugar, desi ghee. Stir till milk gets warm and ghee melts.
3. Stir in maida. Keep stirring till it becomes dough like (happens very quick)
4. Transfer to a mixing bowl. Allow to get warm. Knead for 8-10 minutes till dough becomes smooth.
5. Cover with a lid and let rest for 10 minutes.
6. Take a ball of dough, roll it out like a roti, and cut smaller circles. Since maida has elasticity, the circles shrink a little inwards by the time you assemble, so make decent size for the smaller circles.
7. To make a rose, overlap 3 small circles and pinch at the center. Cut the three circles (only outside the pinched part). Mark 3 cuts so that the circles are divided into 9 equal portions. These will form the petals of the rose.
8. To make the center, cut a small rectangle and roll it into a small cylinder. Make centers for all roses.
9. Shape these cut circles into a rose as shown in the video.
10. Fry at low to medium heat.
11. Also keep the sugar syrup ready by melting sugar in water and thickening it a little. Cook syrup to one thread consistency.
12. Immerse the fried roses while still hot in to warm syrup. Let sit in syrup for 30 minutes.
Take out the roses on to a plate. Enjoy with your loved ones!!
Instant Dahi Bhallas!! No pre-soaking, No grinding, No frying!
Making dahi bhalla, the traditional way, is a time consuming process. Sharing with you a unique idea for making bhallas! This idea was proposed by MasterChef Sanjeev kapoor. A big thanks to him for this unique idea that has made making bhallas a child’s play!
I attended a party in NJ several years back at a colleague’s house. The hostess of the party Anjita had prepared dahi bhallas using this idea. She was kind enough to share her secret of super-soft bhallas. She told that she had read this in an old cookbook by the Masterchef Sanjeev Kapoor. A big thanks to her too for sharing her secret!
Sharing with you my recipe that I built around this unique idea to make a lip-smacking appetizer!
Ingredients:
Yogurt( dahi)
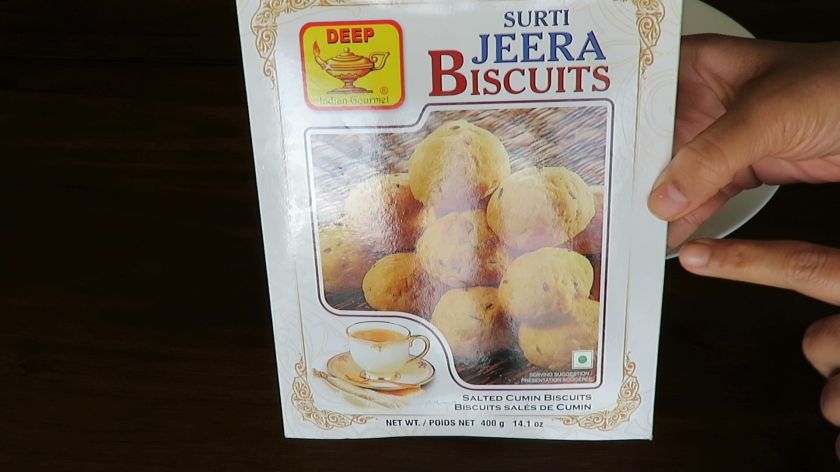
Jeera biscuits (special)
Water
White Salt
Pink salt (rock salt)
Red chilli powder
Roasted Cumin powder
Chaat masala
Sugar (optional)
Tamarind sweet and sour chutney
Green chutney
Method:
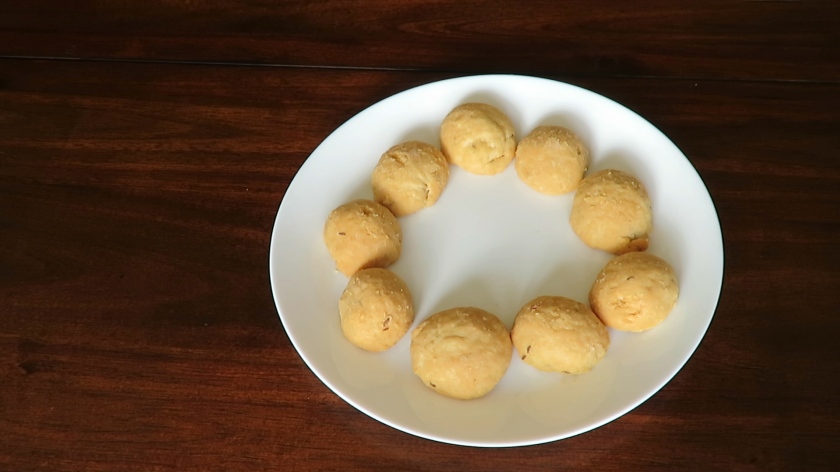
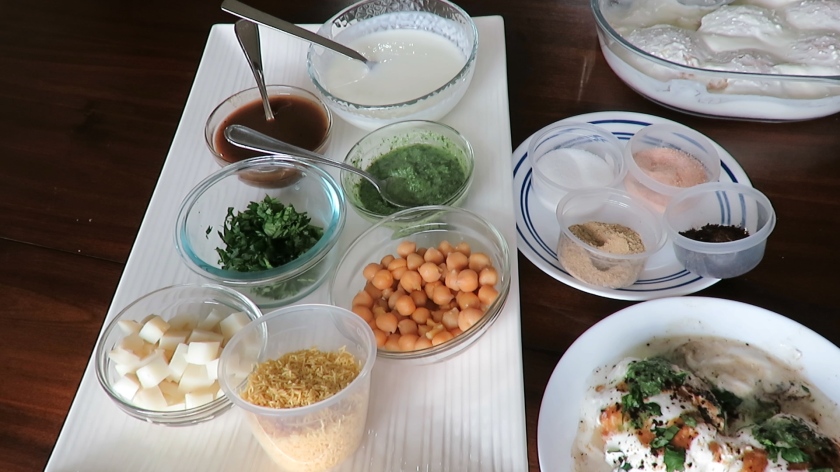
1. Arrange biscuits in plate as shown in the picture. Heat required number of jeera biscuits in the microwave for 40 seconds. Increase or decrease the time as per the number of biscuits.
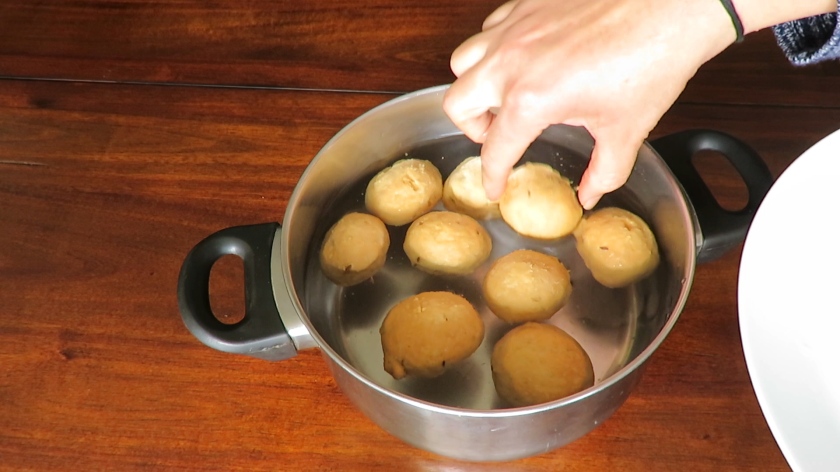
2. Soak these biscuits in water that is at room temperature, for 2-5 minutes.
3. As the biscuits soften, remove them from water. Squeeze gently between your palms.
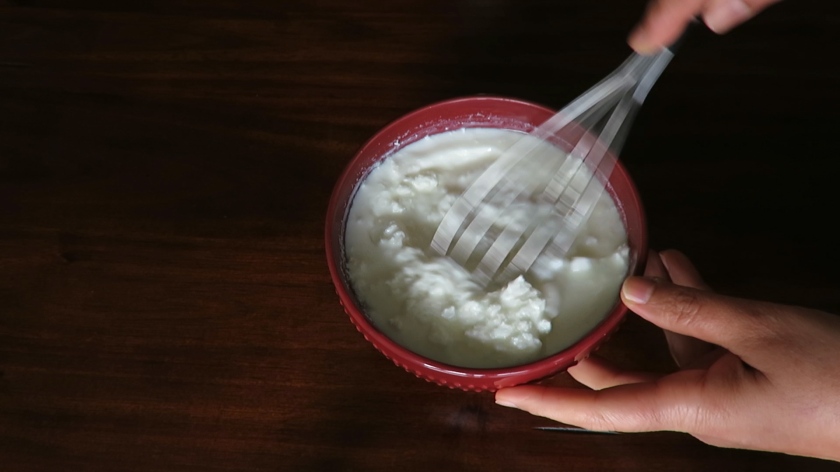
4. Whip yogurt to make it smooth. If the yogurt is thick, dilute with water or milk.
5. Gently place the biscuits on the yogurt platter. Drench biscuits with more whipped yogurt.
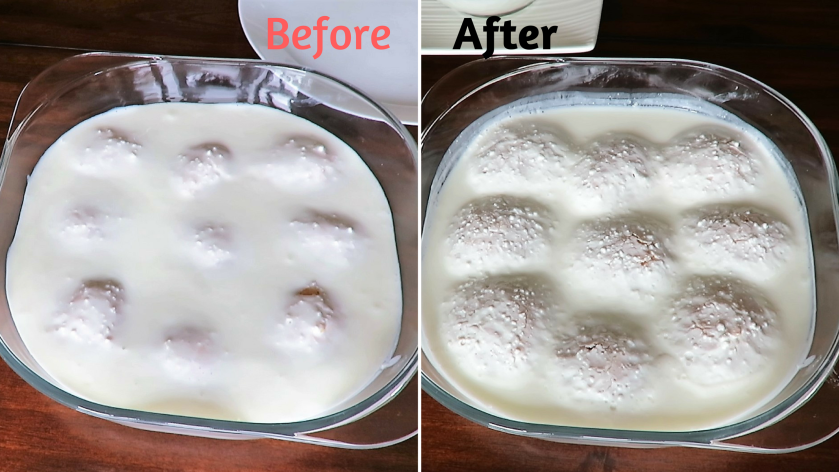
6. Chill in refrigerator for at least 30 minutes. See how in 30 minutes, the biscuits swell up to more than double the size!!
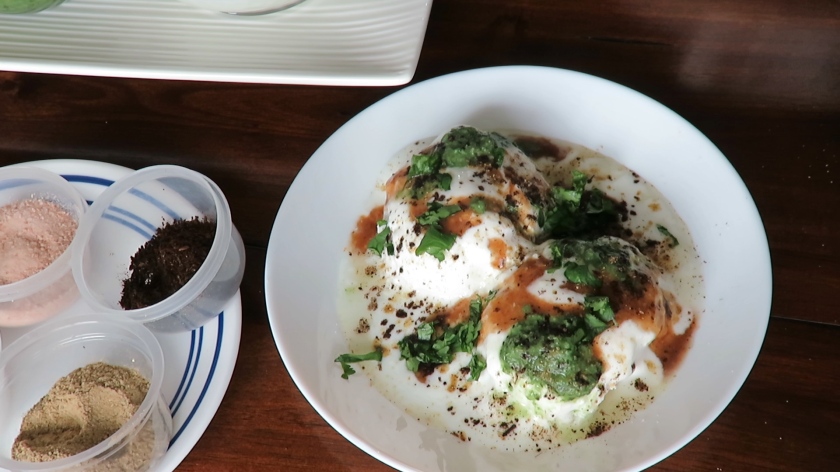
7. Spice it up with salt, pink salted chilli powder, roasted cumin powder and chaat masala.
8. Pour green chutney and tamarind chutney, as per your taste.
Serve chilled!
9. To make Dahi Vada, pour a tempering of mustard seeds, curry leaves and whole red chilies over the dahi bhalla platter. Also add powdered sugar to the whipped yogurt.
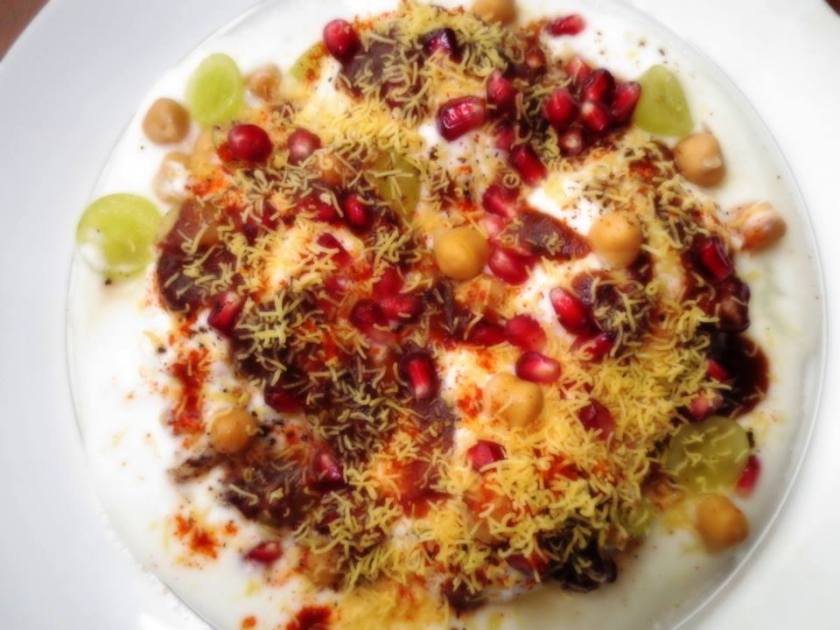
10 .To make Dahi bhalla chaat, add toppings of your choice
Kala chana is a variant of chickpeas and is widely used in the Indian cuisine. Its high protein content makes it very desirable, especially to those wishing to lose weight. Its soup is very healthy and is recommended for quick energy. This can be made either dry or as a curry.
Ingredients:
Kala Chana/Black chickpeas (1 cup)
Split Bengal Gram (1 1/2 tbsp)
Water ( As required)
Oil (2 tbsp)
Desi Ghee (1 tsp)
Bay Leaves ( small 2)
Cumin Seeds (2 tsp)
Turmeric Powder (1/3 tsp)
Coriander Powder (3/4 tsp)
Red Chili Powder ( 1/3 tsp / as per choice)
Salt (1 tsp/ as per choice) Garam Masala (1/2 tsp)
Ginger garlic Paste (1tbsp)
Tomatoes (chopped 3/4 cup)
Onions (chopped 3/4 cup)
Coriander leaves ( for garnishing)
Method:
1. Soak kala chana and dal in 3 cups of water for 10 hours.
2. Drain and discard the water.
3. In a pressure cooker, warm 1 tbsp oil and add cumin seeds. Add bay leaves and fry till cumin is nicely fried.
4. Add all spices except garam masala.
5. Add drained chanas and dal, and fry for 2 minutes.
6. Cover cooker with a lid and allow steam to build up to maximum ( or 2 whistles in a conventional cooker).
7. Reduce heat to low and let cook for 20 minutes. Allow natural release of pressure.
8. In a pan, warm 1 tbsp oil and 1 tsp desi ghee.
9. Add ginger garlic paste and sauté.
10. Add onions and fry till golden brown.
11. Add tomatoes, mix and cover with a lid.
12. Keep stirring after every few seconds.
13. Saute till the tomatoes are soft and oil leaves the sides of the masala.
14. Add a tbsp of water. Switch off the heat and allow to cool.
15. Blend the masala in a mixer. Blend till neither very fine, nor very coarse.
16. Add the blended masala to the boiled chanas. Add garam masala and few chopped cilantro leaves.
17. Cook for a few minutes, till gravy is desired consistency. If need be, add more water to achieve desired quantity of gravy.
18. Serve garnished with onion rings and chopped cilantro leaves.
Orange and tomato soup is a very healthy, nutritious, versatile soup that can be served both, cold and hot. Serve it hot as an appetizing soup or a light curry with rice , else serve it chilled as a welcome drink.
Ingredients:
Butter (2 tbsp)
Bay Leaves (2small)
Cinnamon stick(1 small)
Onions (coarsely chopped 1 cup)
Potatoes (diced 1 cup)
Tomatoes (coarsely chopped 4 cups)( You may use frozen tomatoes as well)
Orange Juice (½ cup)
Orange Zest (1 tsp)
Salt (2 1/2 tsp or as per taste)
Black Pepper (1/2 tsp)
Water/ Chicken stock/Vegetable stock (1 ½ cup or as per desired consistency)
Sugar (1 ½ tbsp)
Tomato Ketchup( 2tsp optional)
Method:
1. Set a pan to heat at medium.
2. Melt butter, and add bay leaves and cinnamon stick. Saute .
3. Add onions and fry till they turn transparent.
4. Add potatoes and cook for a minute.
5. Add tomatoes, salt, pepper, orange juice, orange zest, and water/stock.
6. Transfer to a pressure cooker, and cover the lid.
7. Once pressure builds to a maximum, reduce heat to low and pressure cook for 7 minutes.
8. Allow natural release of pressure.
9. Uncover the cooker. Remove bay leaves and cinnamon stick.
10. Blend to a smooth puree. If blending in a mixer allow to cool a little before blending.
11. Transfer back to the cooker ( now rinsed) and heat.
12. Add sugar and ketchup. Mix well, and bring to a rapid boil
Serve piping hot garnished with cilantro/ orange slices/ cream/ croutons.
OR serve chilled garnished with mint leaves and orange slices.
To cook in a pan:
A. Begin with chopping onions, potatoes, and tomatoes small in size so that they cook faster.
B. Proceed as in method given above till point 5. Add an extra cup of water/stock. Cover the pan with a lid.
C. Allow to come to a rapid boil and reduce heat to low-medium.
D. Stir once every few minutes for even cooking.
E. Cook till all the veggies become very soft and mushy (approximately 20-25 minutes.
F. Uncover the pan and allow to cool a little, before blending.
G. Proceed as in point 12 above.
1. Blend ½ cup of cold left-over rice to a smooth paste
Do not add water while blending rice
2. Transfer blended rice to a mixing bowl
3. Grate two boiled and cooled down potatoes
Do not mash potatoes using your hands or a potato masher
4. Mix the blended rice and grated potatoes, and knead a smooth but dry dough
If need be, add little rice flour/corn flour/blended poha/bread crumbs to make a dry smooth dough
I added one tablespoon rice flour, just enough to take care of extra moisture in the dough
5. Incorporate the flour into the dough and knead well to make a smooth dry dough
6. Apply some oil on your palm and smoothen out the dough
7. Allow the dough to rest in the refrigerator for sometime
To make stuffing for the patties:
1. Wash the dal. Add 1 cup water, 1/4 tsp turmeric powder, and 1/3 tsp salt
2. Pressure cook for two whistles. Allow natural release of pressure
Make sure that the dal is cooked and soft, but not mushy
3. Drain the cooked dal onto a sieve
4. Microwave the Frozen green peas for 2 minutes with little water
If using fresh green peas, boil them with the dal
5. To make stuffing, set a non-stick pan to heat at medium
6. To the warm pan, add 2 tablespoon oil
7. To warm oil, add a teaspoon cumin seeds
8. Add chopped green chilies to the crackling cumin seeds
9. Fry green chili for a few seconds
10. Add microwaved green peas
11. Transfer the boiled and sieved dal
12. Add 3/4tsp salt, and little red chili powder. Spices will be on the plus side in this mix
1/3 tsp garam masala, 3/4 tsp coriander powder, and 1/5 tsp dry mango powder, little sounth.
If you are using fresh grated ginger, then saute it after the cumin seeds before adding green chilies
13. Mix well, and cook for a minute or till the excess water dries out
14. Add chopped cilantro leaves and mix well
15. Press the mix a little to mash dal and the peas
16. Transfer the stuffing mix onto a plate for quick cooling
NEVER stuff patties with hot mix
Wrapping up the tikkis
1. Apply some oil on your palms, and divide the dough into equal sized 6 balls
2. Apply oil on your palm and flatten each ball using your fingers
3. Shape the flattened disc like a bowl by raising the dough at the circumference
4. Transfer 2 teaspoon stuffing mix onto the flattened disc
5. Press the mix inwards using your fingers
6. Press the disc between your palms to bring together the loose ends of the discs
7. Seal the patty with a firm hand. There should not be any cracks in the patty
8. Press lightly between your palms to flatten it and shape it like a patty
9. Roll the patty on your palm to give it a smooth circular shape
In the same manner, prepare all patties
There should NOT be any cracks in the wrapped patty
You could roll the patty between your first finger and your thumb, to give the patty a smooth circular shape
Frying the tikkis
1. Set a flat bottomed pan with oil to heat at medium
2. At any point of time during frying, there should be enough oil in the pan ; atleast more than half the height of the patty
3. Check the heat of oil by dropping in a small piece of dough. Oil around it should sizzle, meaning the oil is ready for frying
Inspect patties for any cracks. Seal properly before dropping in the oil
4. Drop patties in the hot oil. Reduce heat to low-medium
Do not over-crowd the pan with too many patties
5. Fry patties on both sides. Do not turn over too many times
6. One batch of patties takes about 4-5 minutes to fry
Fry all patties in the same manner
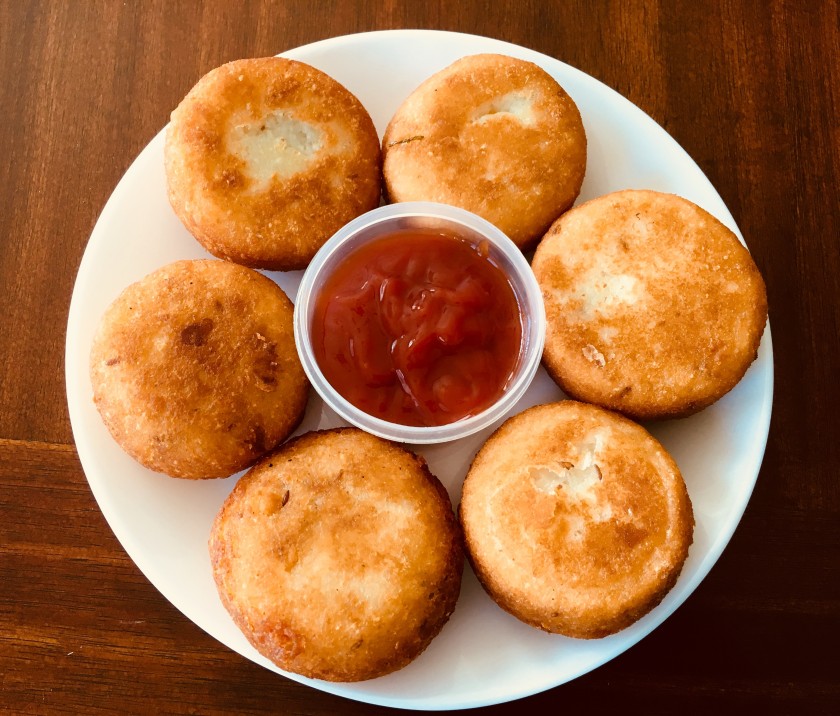
Crisp potato patties, also known as ‘Aloo ki tikki’ in Hindi are ready to be enjoyed
A yummy way to use your left-over rice!!
Crisp golden Aloo tikkis can be enjoyed several ways
Enjoy Aloo tikki as is, with tomato ketchup
Sandwich aloo tikki between two bread slices and enjoy!
Make an Aloo tikki burger!
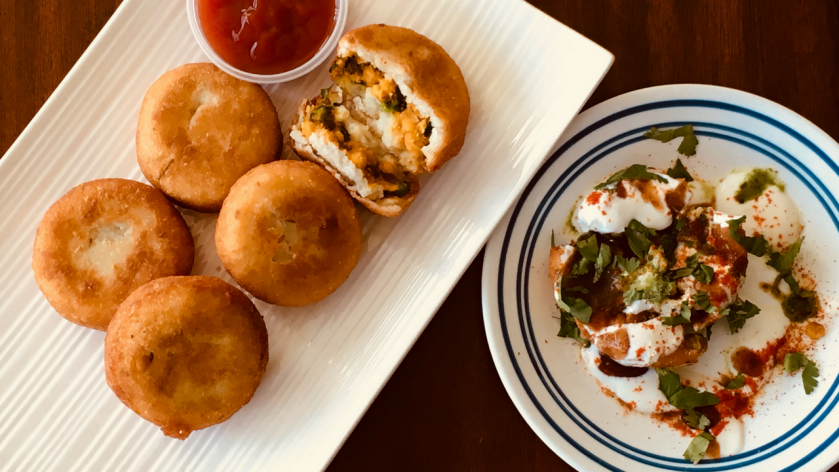
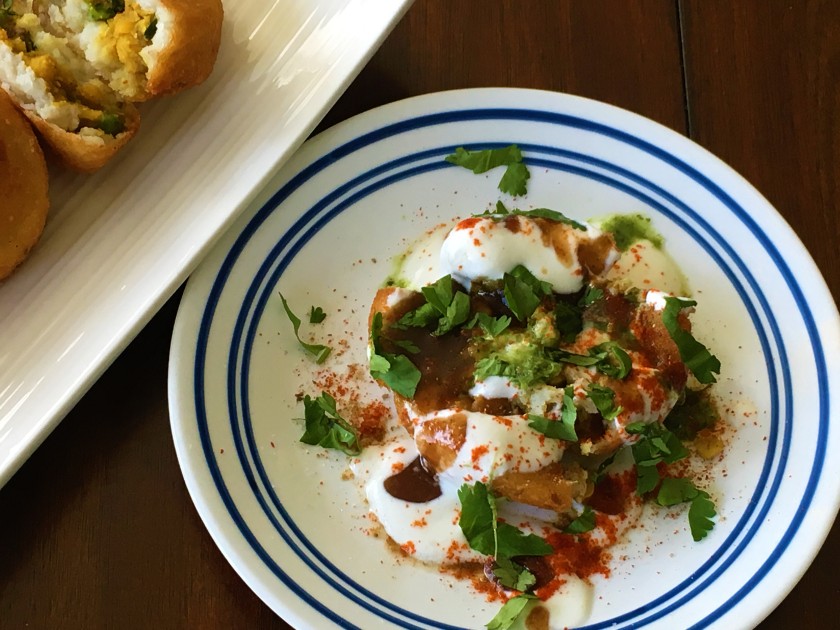
To make spicy aloo tikki chaat, tear open the tikki onto a plate
Sprinkle little chaat masala, and 2 tsp thick beaten yogurt (optional)
Top up with green chutney, sweet and sour chutney
Garnish with salt , red chili powder, and chopped cilantro leaves
Shredded processed cheese (2 cups or more as per choice)
Oil (1 tbsp+ for frying)
Italian seasoning
Chili flakes
Maida ( 1 tbsp)
Water (2 tbsp)
Method:
A Making the filling
Set a pan to heat at medium.
To the warm pan, add a tbsp of oil.
To warm oil, add chopped onions, and sauté till light pink.
Add beans. Saute for 30 seconds.
Add capsicum. Saute for 30 seconds.
Add cabbage. Saute for 30 seconds.
Add carrots. Saute 30 seconds.
Add 1/3 tsp salt. Mix well. Switch off heat.
Transfer the mix to another bowl for cooling.
Once the mix is completely cool, add 4 tbsp shredded cheese and mix well.
Add 1 ½ tbsp chili flakes or as per choice.
Add little Italian seasoning as per choice.
Always check for salt after adding cheese. Add more if need be. I needed to add ¼ tsp salt.
B.Making maida paste for sealing
To 1 tbsp maida, add water little at a time, and make a smooth thick paste.
C. Making semi cooked rotis first
Roll a very big roti.
Cook it very lightly from both sides.
You could prepare all these semi cooked rotis first, and assemble later.
D. Assembling the paratha
On the outer edge of roti smear maida paste (till 1/2 inch from outer edge)
Transfer ¼ of leftover cheese to the center of roti. Layer with ¼ prepared filling. Shape filling like a rectangle.
Fold roti one by one from all sides to seal like an envelope. Apply more paste on open surfaces for easy sealing.
Fry parathas on the tawa.
Another method is to cook roti lightly from one side. Flip it over. keeping heat at lowest, assemble paratha while still on the tawa, and fold like an envelope. Fry the paratha. This method needs you to work very fast.